
1. Context
1 - In which case do we use customized Google sheet repositories?
- Firstly, setting up a customized Google sheet repository as a source is useful when you don't have a sufficiently up-to-date/usable dataset for the business entity concerned. For example, Google sheet repositories are often used in the case of product repositories.
- Furthermore, it also gives you greater flexibility in adding/removing new columns to your dataset. For instance, in the case of a product repository, this allows you to add products marketed over a specific period.
2 - What is Make and why do we use it?
Make is an automation tool that lets users create automated workflows to simplify their work.
This is a good tool to use in conjunction with Octolis, as it automates the import of CSV files at regular intervals on the SFTP connector. Coupled with Octolis' regular source import functionality, this allows you to automate continuous data updates between a Google sheet CSV file and an Octolis dataset.
2. Implementation
1 - Setting up the import
Step 1 - Publish the corresponding CSV Google Sheet file and get the link
After opening your Google sheet source file, go to "Files" then "Share" then click on "Publish on the Web".
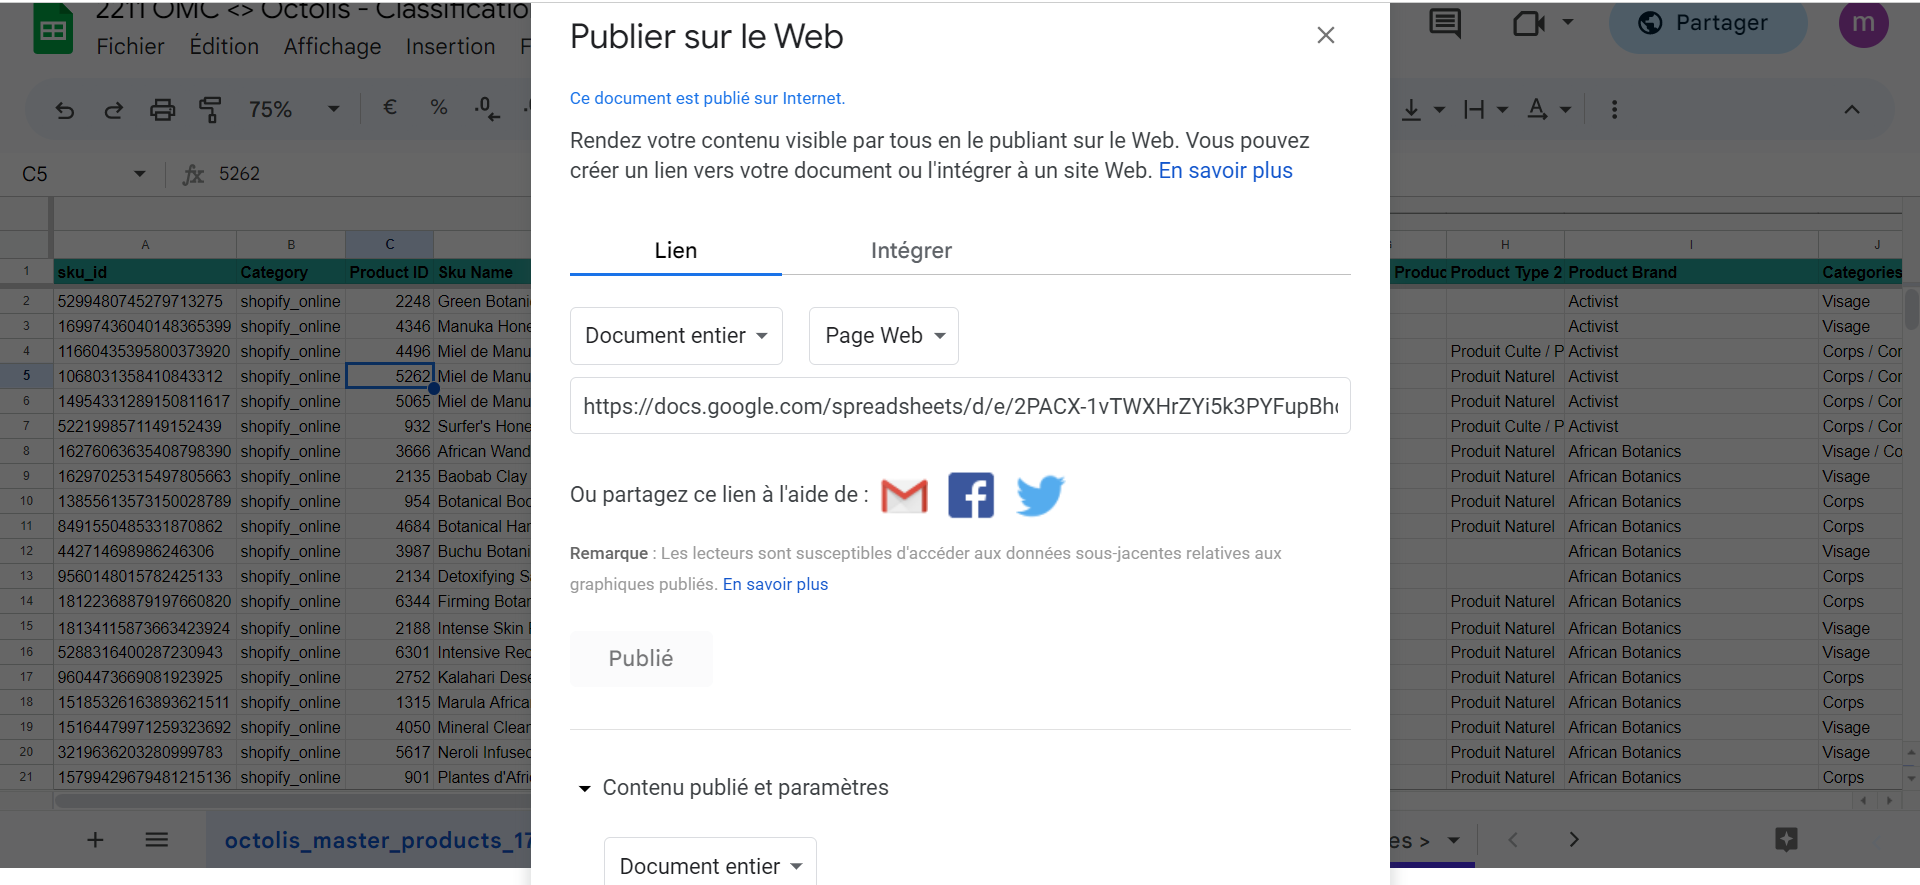
You can click on “Publish” and copy the link provided by google sheets.
Step 2 - Create a Make Scenario for your import
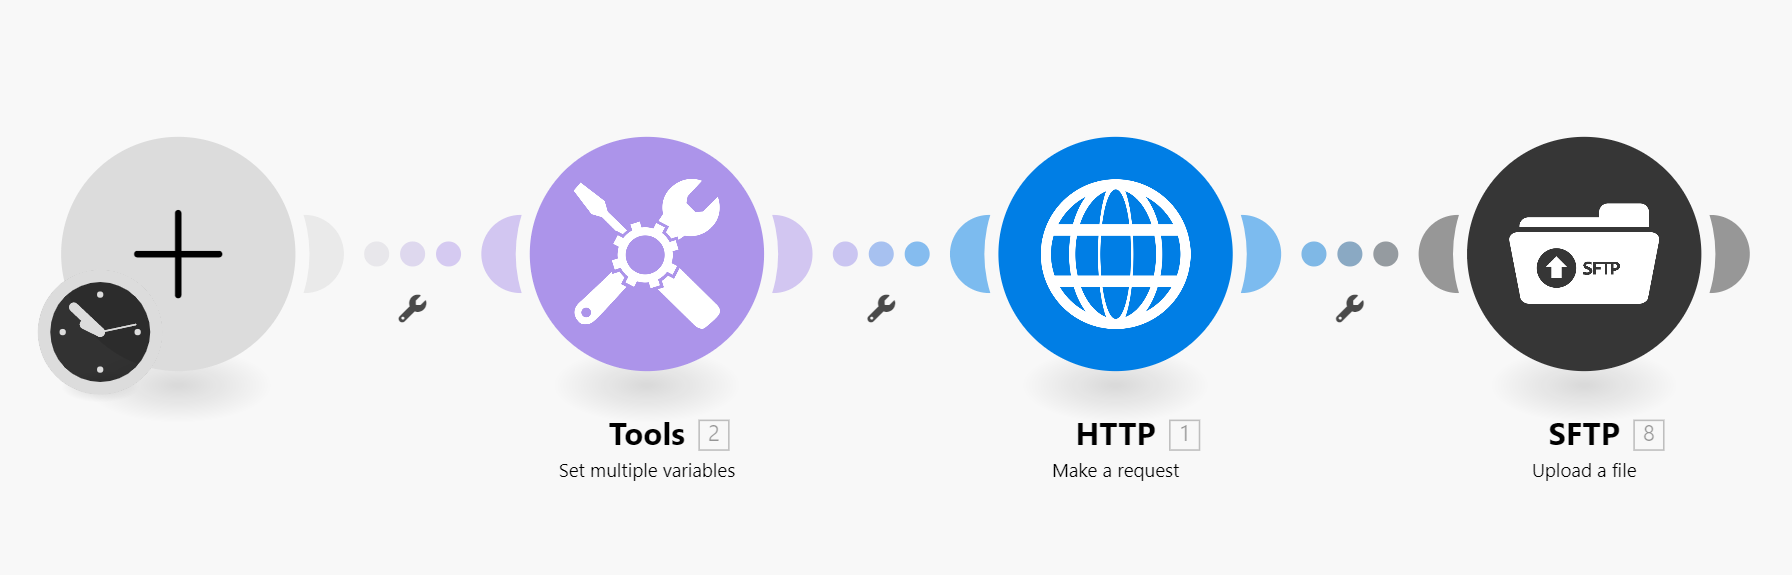
First, you can create your scenario structure following this example.
- Connect 1 module “Tools”, 1 module “HTTP” and 1 module “SFTP” in the following order:
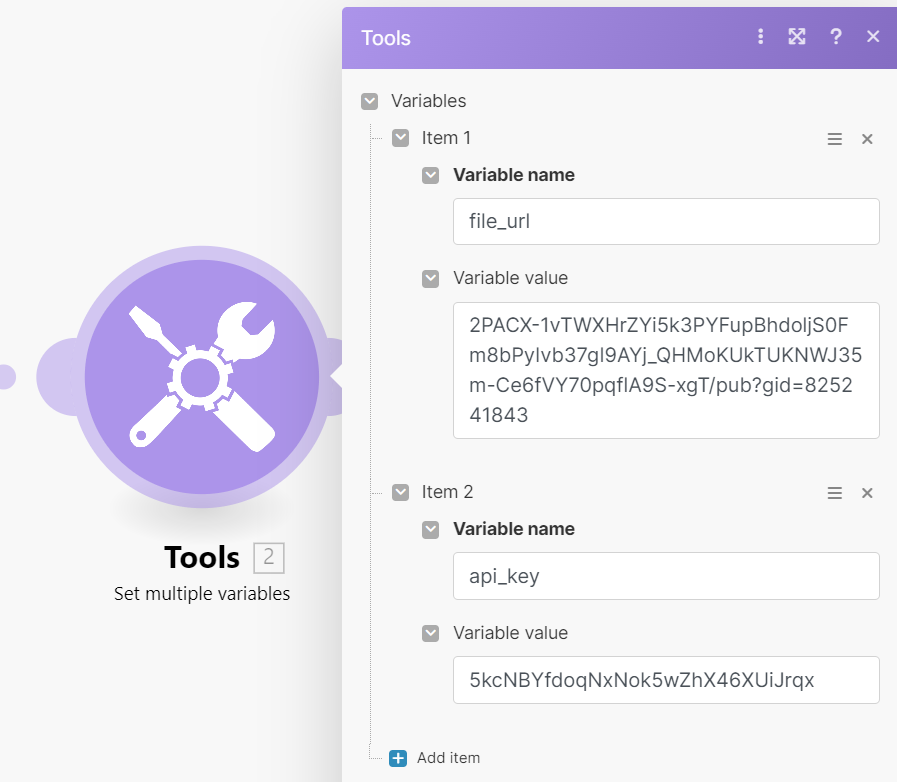
Then, enter the parameters for the various modules:
- Enter the link ID of your Google sheet file in the “Tools” module.
- Set the HTTP module accordingly to ensure the import of your source file.
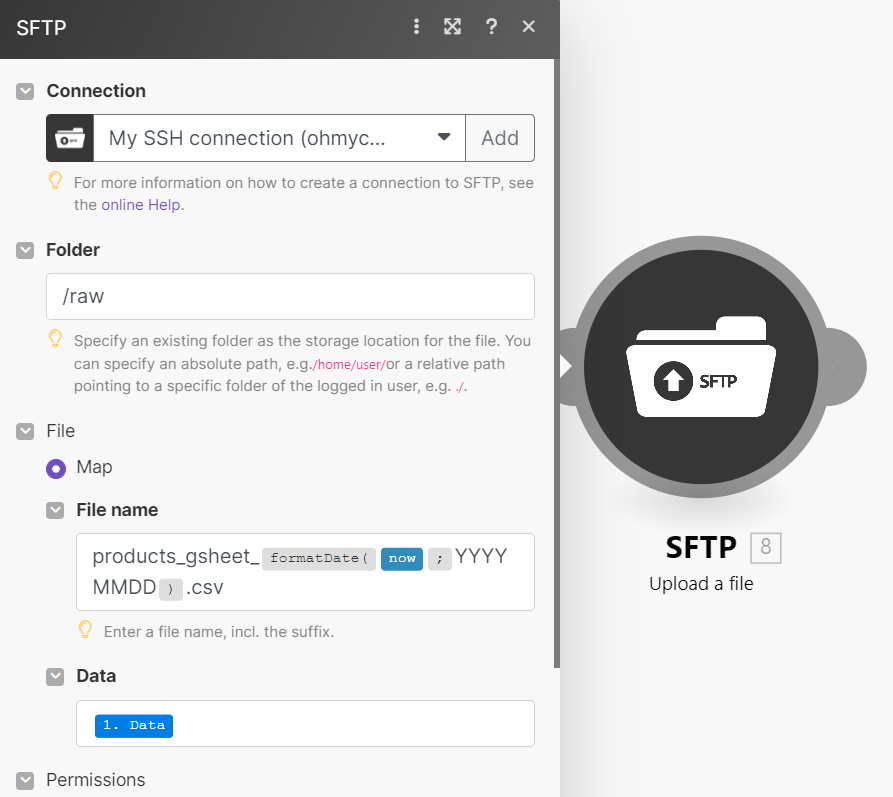
- Connect the SFTP module to your SFTP account, specifying date formatting in the file name if necessary.

Step 3 - Trigger the workflow
Once your module settings are completed, you can run your workflow once to check if your file is correctly imported into your SFTP.

Then, you can schedule an automatic import of your file on a regular basis if needed and you are all set!
2 - Adding a new field to your dataset
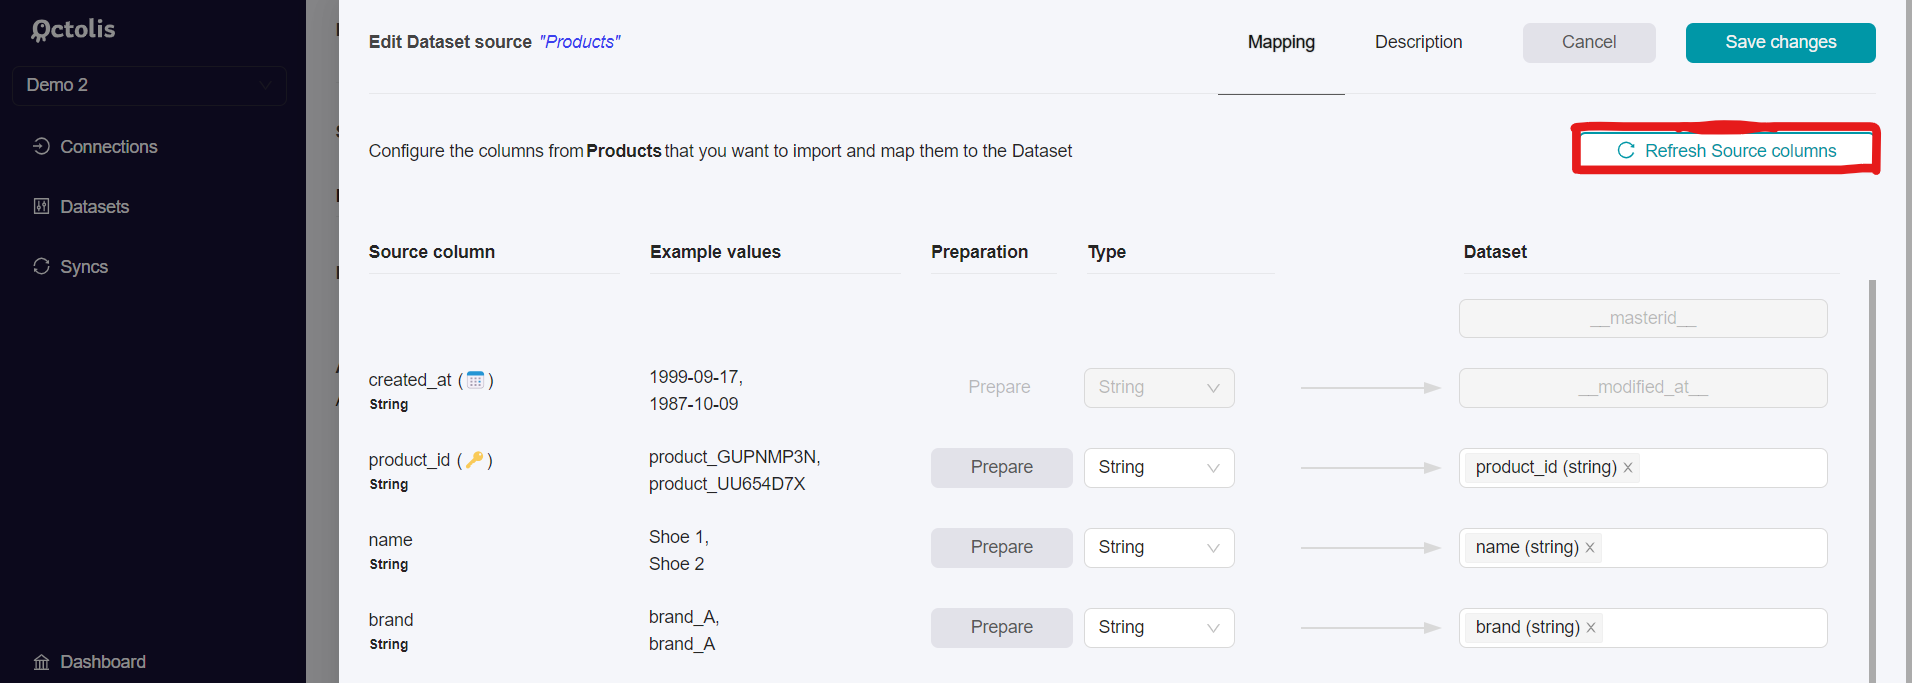
Then to add the new column to your dataset in Octolis, you can go into the Source settings and click on “Refresh Source columns”. This will detect the new column and add it to your Source, you will then be able to map it on your dataset.
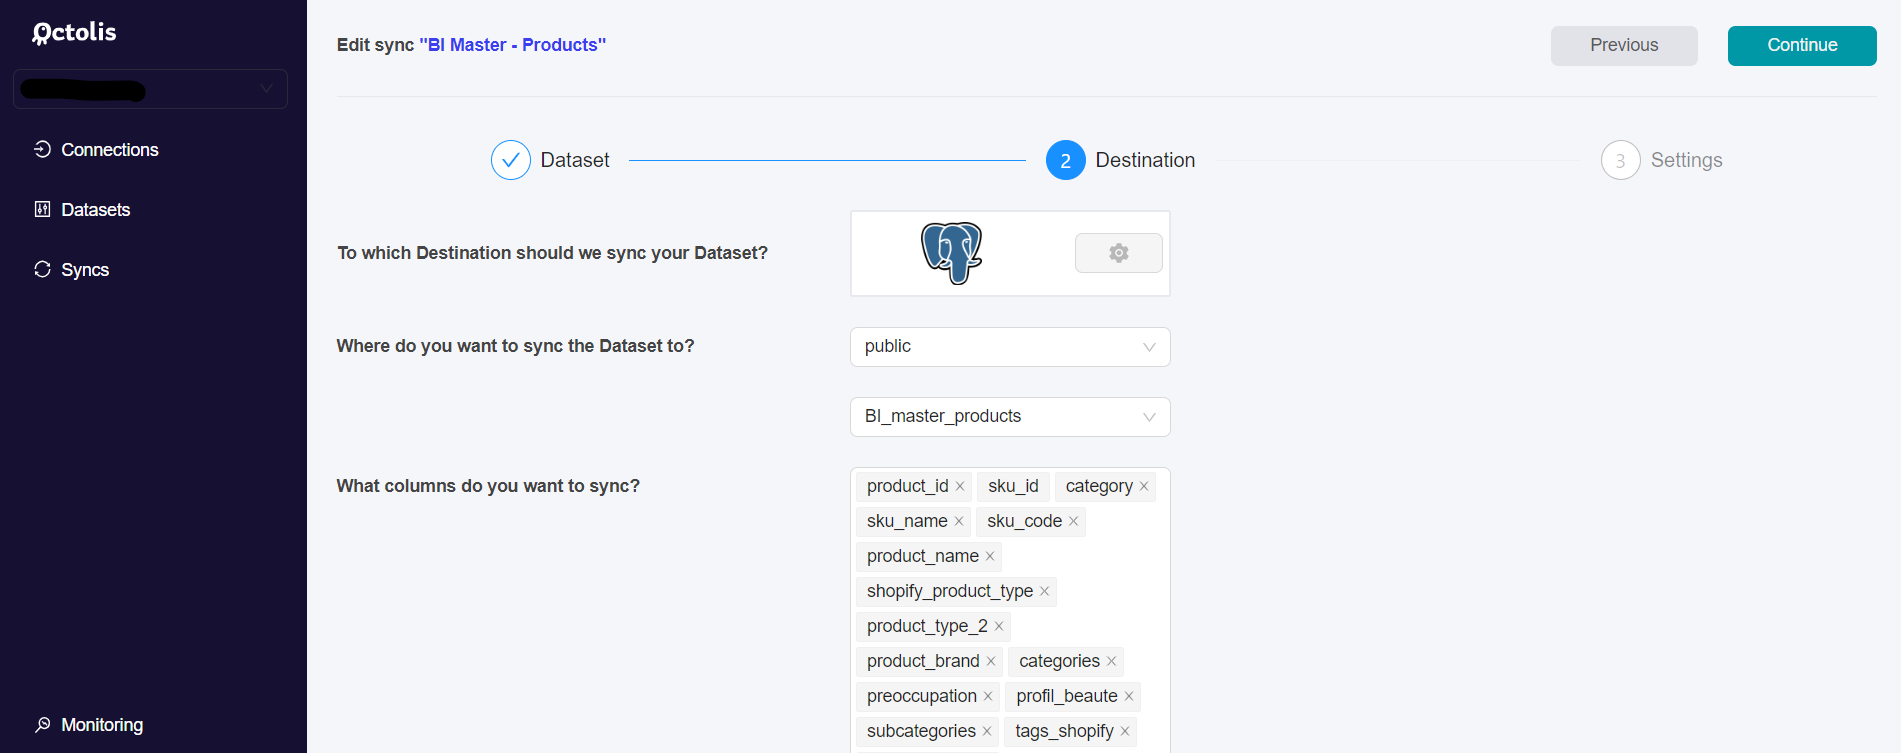
Then, to add the new column to your database, you just have to go into the corresponding sync settings and add the corresponding column in the field “What columns do you want to sync?”.
Now all your tools are up to date, the new column has been added to your Dataset, in Octolis, and in your Database.