
1. Introduction
A dataset is an organized and structured view of a business entity and its related data on which you can apply normalization rules and scores to make your data reliable and actionable
A dataset can combine data from multiple sources such as Eshop, POS systems, customer support, or a company's website. Here are a few examples of the datasets you might want to build :
- Master Contacts: Combining all contacts from different sources
- Master Contacts x Orders: In addition to all contacts, add information like the number of purchases, the average basket value, etc.
- Top Customers in France
- Products listing, List of stores, etc.
- …
Through our platform, you have the ability to create either no code or SQL datasets, we’ll focus on “No code” dataset creation.
2. Step-by-step guide
Step 1 - Create a dataset
From the left Menu Datasets, you can click on “Build Dataset” at the top right.

You will be invited to choose between “No code Builder” or “SQL Builder”, and to give a name to your dataset.

Step 2 - Choose the first source
Datasets can be built from raw data sources, or from existing datasets.
If building a dataset from external sources, make sure that this Source is configured in the “Connections” menu.
The following steps concern sources configured via STFP, if using another kind of connector, you can jump straight to step 4.
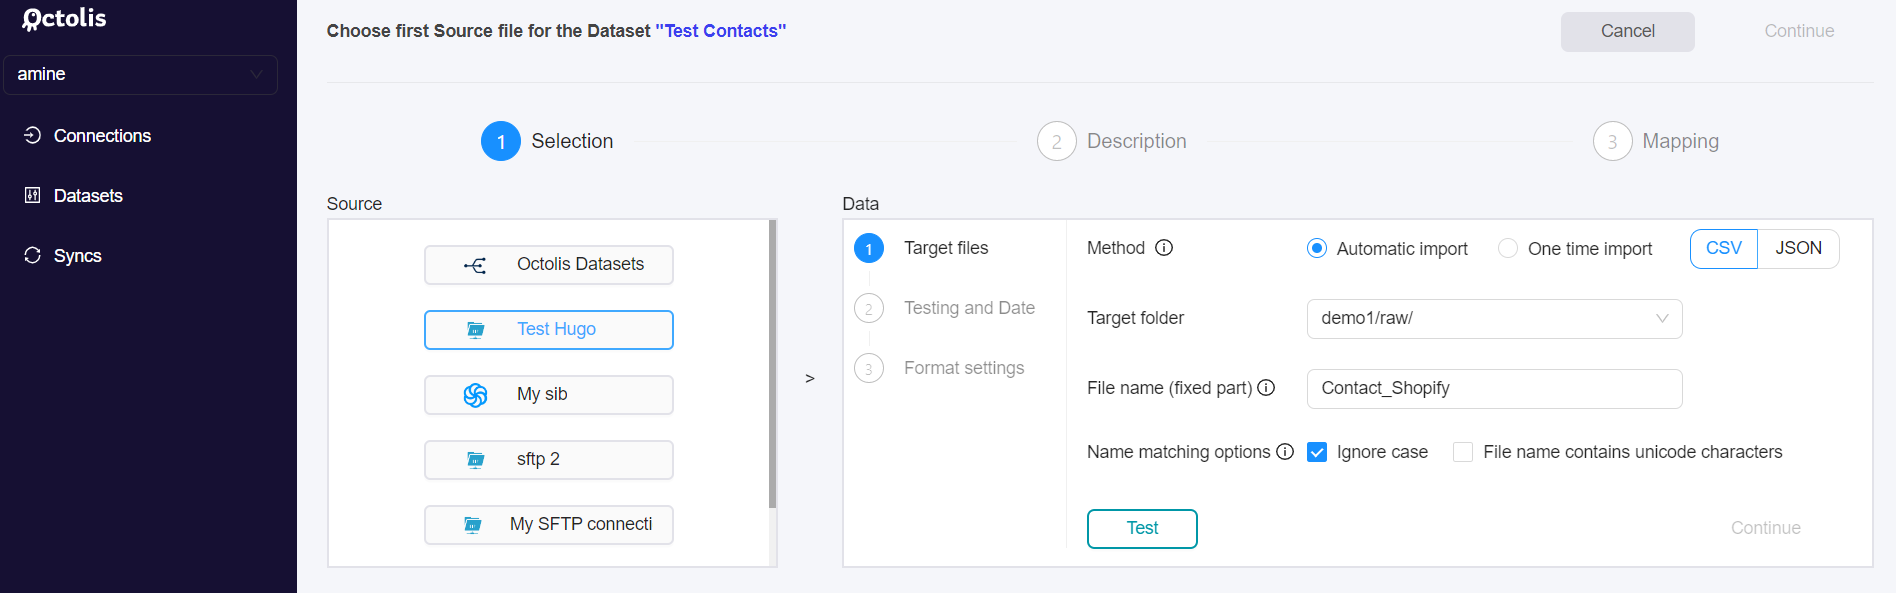
After choosing the SFTP source of your dataset, you have two options:
- One-time import - Mainly used for initialization or ad-hoc tests and campaigns.
- Automatic import - Allows performing imports (of one or more files) on a recurring basis, over time periods specified in the settings. Using this option, Octolis will consume any file that matches the name and date pattern you will set up as follows :
- “File name (fixed part)”: The part of your file name that will not change from one import to another, a business entity most of the time.
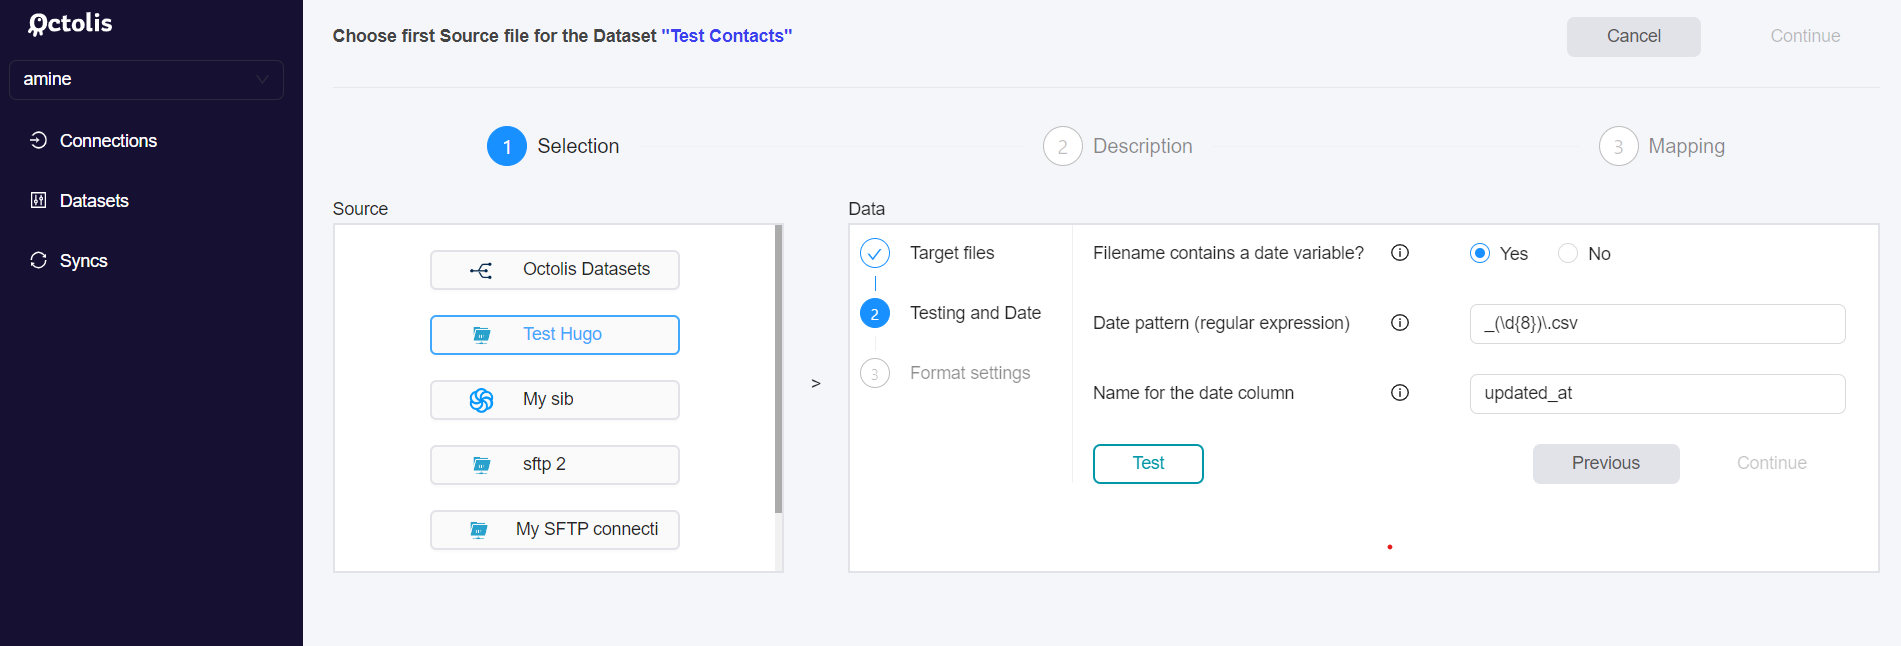
- “Date pattern (regular expression)”: Variable part of your file name which will be modified at each import. Here, the field you have to fill in is the regex expression that will allow us to extract in the name of your file, the date of the import.
For instance within the following file
contacts_salesforce_20220315.csv : contacts_salesforceis the fixed part.
YYYMMDDis the date pattern that will be updated at each import.
If you are not a Regex pro, feel free to use Chat GPT to help you. You can use the following prompt “Give me the regex expression to extract the date from the name of this file contacts_salesforce_20220315.csv”
- Select the format settings for the file extraction.
Step 3 - Describe the first source
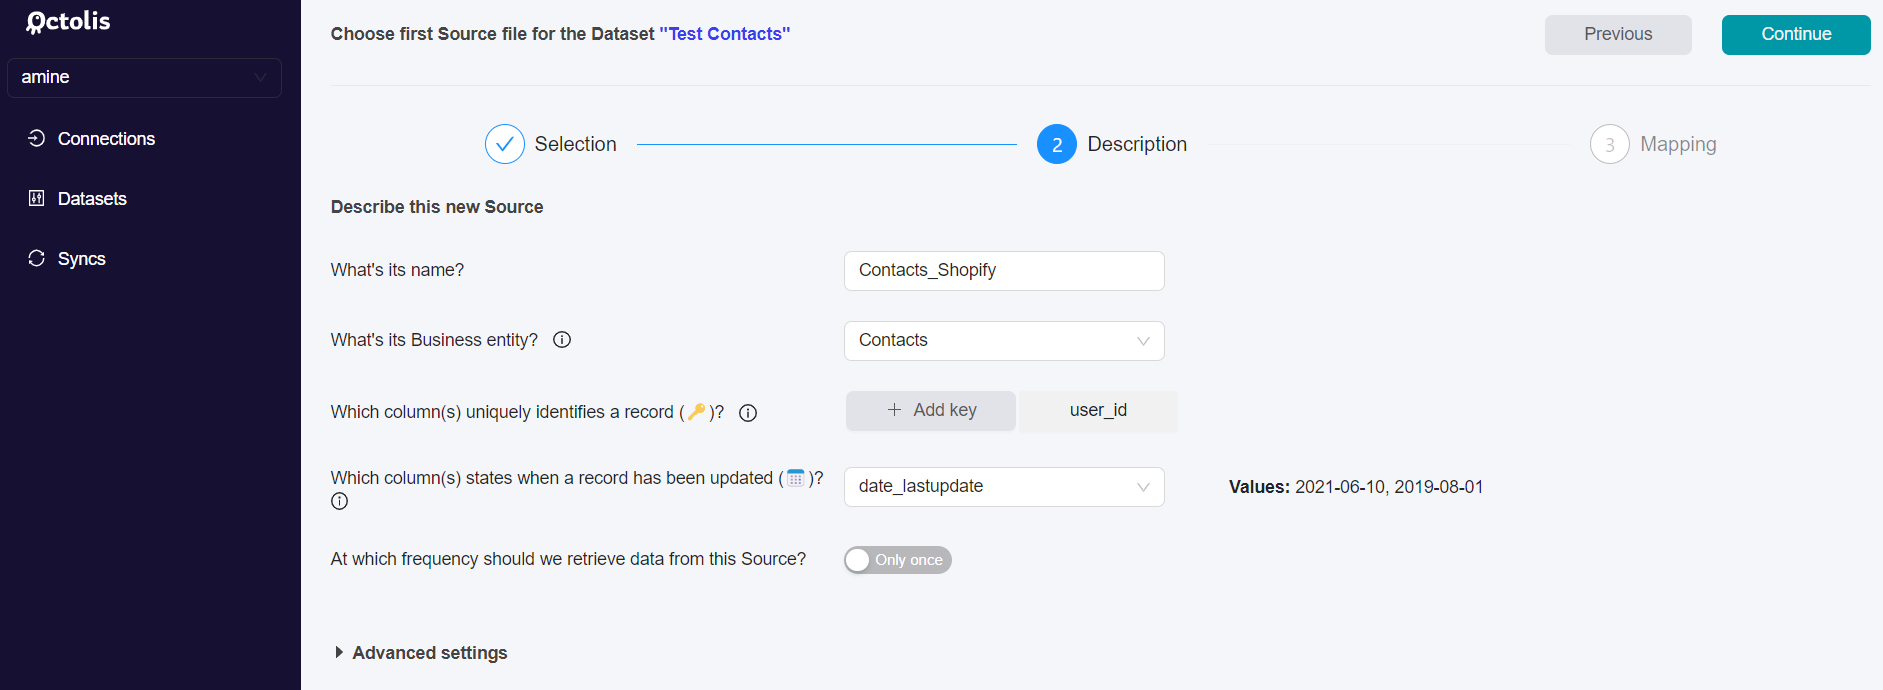
For the third step, you will be describing your source. You will be invited to :
- Give a name to the data source you have just chosen.
- Match the data source with a business category. The purpose here is to give a business sense to the data source.
- Define the “Key” or “Dedupe Key” (column which uniquely identifies a record). More info on dedup here.
- Define the column stating when a record has been updated (ex: update_date)
- Choose the frequency at which the dataset will be updated from this data source. By default, Octolis fetches the data source every hour for new or updated records. Depending on your plan, it is possible to set this frequency at 1mn.
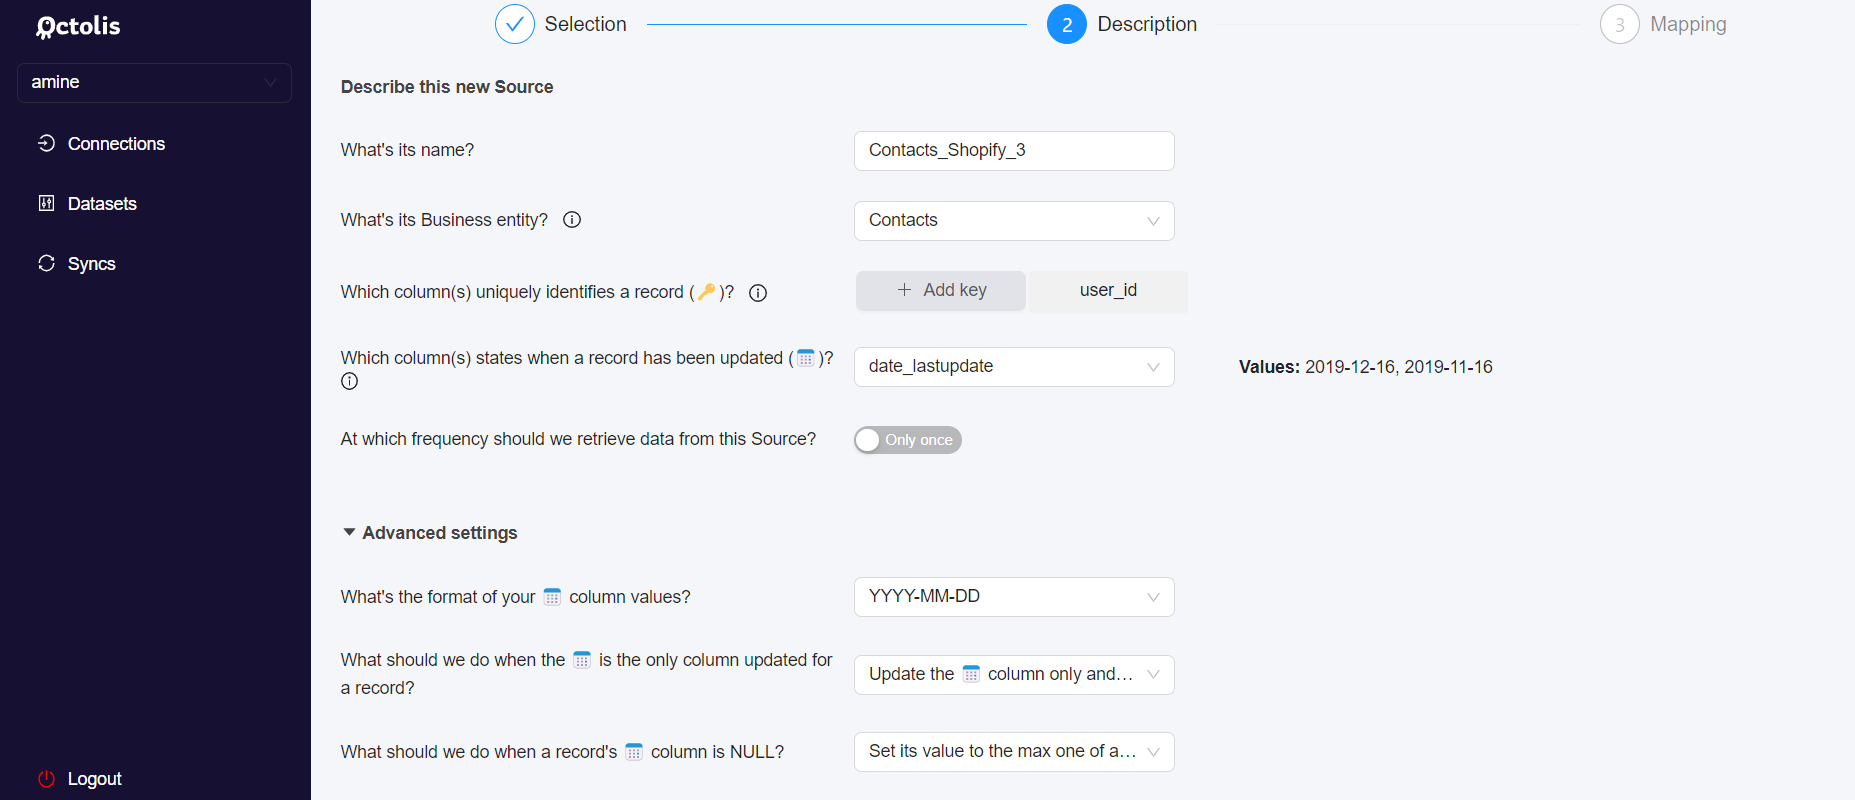
In the “Advanced settings” menu, you can specify the format of your date column values and the type of dataset update you wish to implement.
You can also specify the policy you want to set up regarding records with a NULL value in their date column:
- Set the value to the max one of all incoming records
- Filter out the record
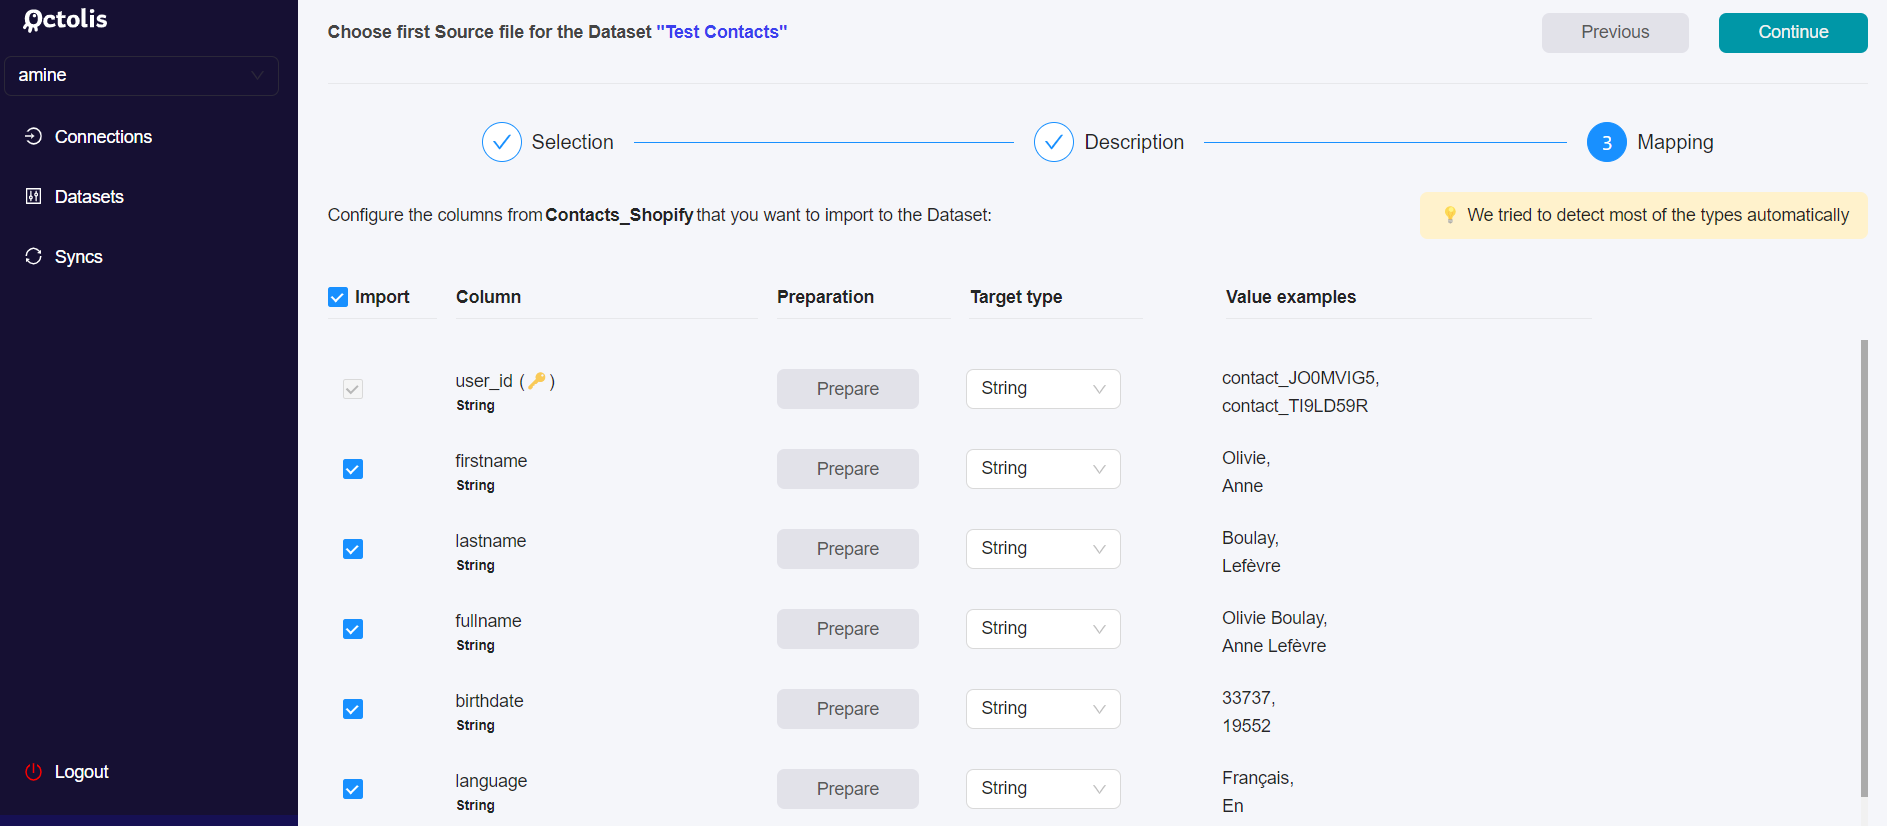
Step 4 - Define, Prepare, and Map the fields to import
1 - Select the fields you want to import
The objective here is to choose the fields from your data source that will be imported into your dataset. You can choose all fields or select only some of them.
Octolis automatically detects most data “Types”. However, please take the time to review the right data “Type”, as a wrong data “Type” may create issues when applying a data preparation recipe on this column.
In the “Advanced settings”, you can choose between :
- importing all the data source files each time
- importing only the updated records since the last import, to fuel the dataset.
For performance reasons, the default and recommended option are to import only the last updated records. This implies having a reliable “Updated at” column in your source file.
2 - Prepare your columns
When you add a new source, it’s possible to add some preparation rules for each column in the mapping step.
The main purpose of source-level data preparation is to prepare columns used for dedupe.
Because the dedupe is processed just after importing the sources, it could be necessary to normalize the columns used in the dedupe at the first step, right after importing the sources files.
For example, if you want to dedupe your contacts based on Email x Phone number, you will need to normalize these 2 columns to be sure that “john.doe@gmail.com x 0660036339” matches with “JOHN.doe@gmail.com x +33660036339”.
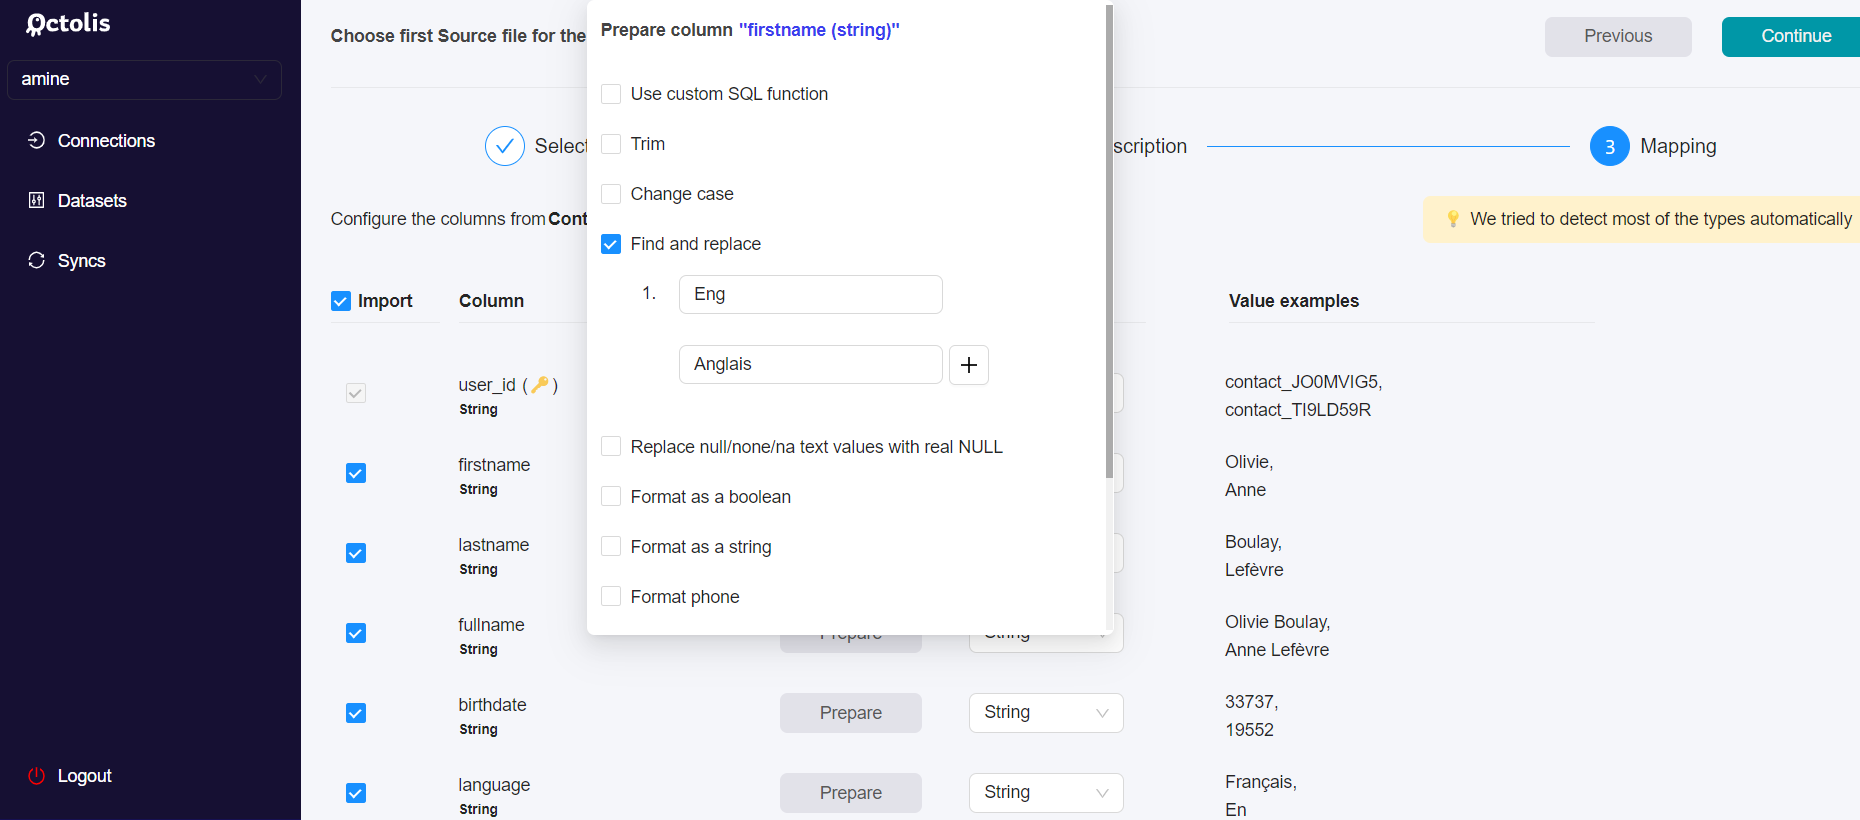
Most data prep options available at this step are quite easy to understand. For each column, you can choose to put the column value in “lowercase” or to apply a “Find & Replace “ function.
In the end, when you click on “Continue”, the fields will be mapped with your dataset, and you will be able to see a preview and save it.